
Using the Calendar
The calendar view allows you to visually see workload across your team and consists of the following major components:
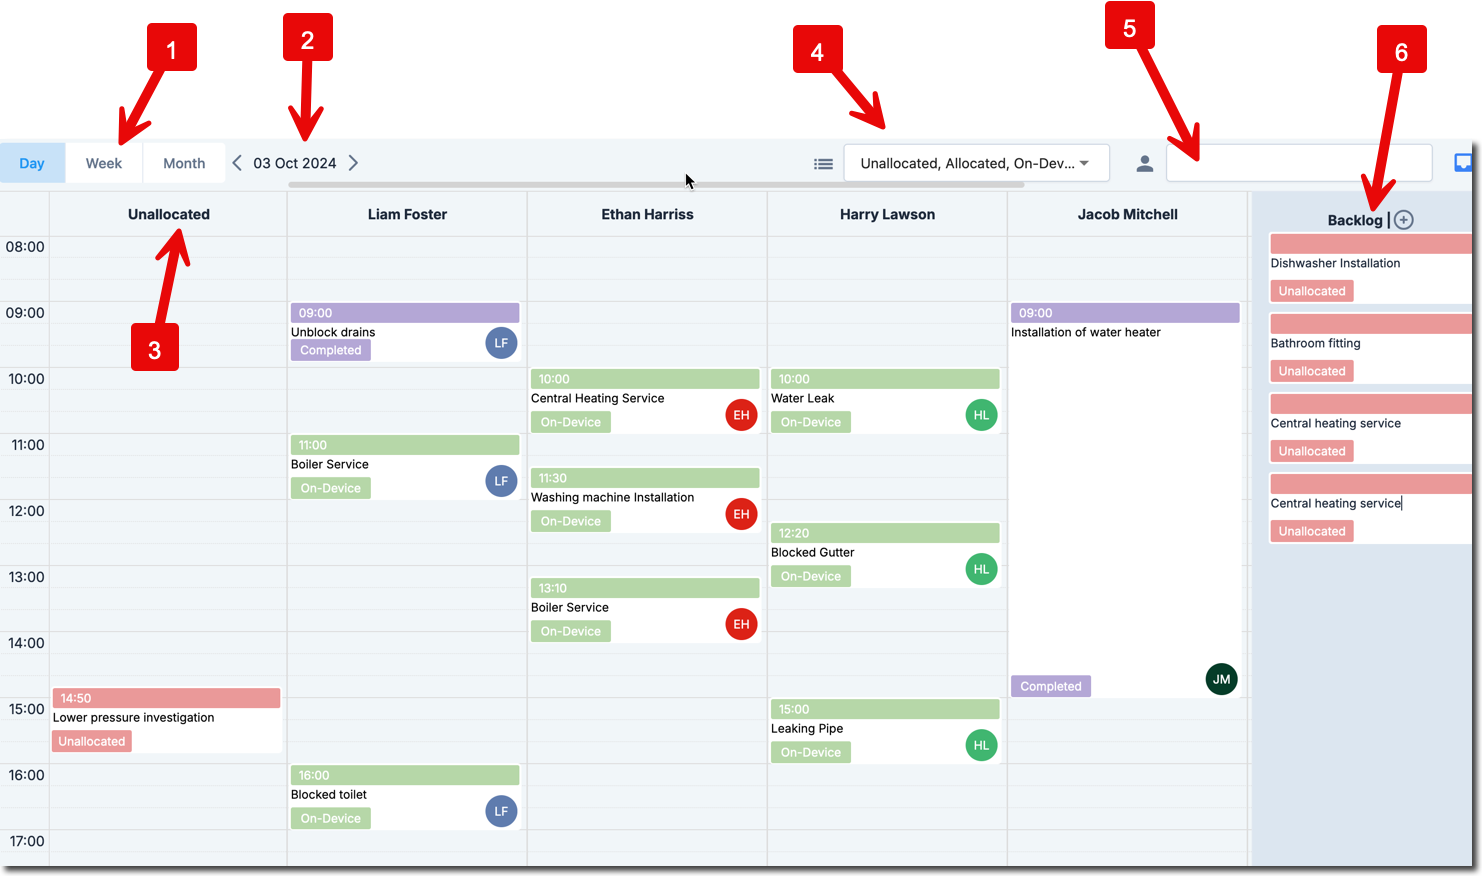
- View Picker
Select between Day, Week or Month.
Note: When viewing in either Week or Month, you will be asked to choose a particular resource if a resource isn't currently selected.
- Data Picker
Allows you to choose the date that you're interested in.
- Unallocated
When in the day view, the Unallocated column shows any jobs that you have added into a specific timeslot for the day, but have yet to allocate to a specific resource.
- Status Filter
A job goes through a range of status changes throughout its lifecycle. You can visually see the status of any particular job by the colour of the job card. You can use the Status Filter to hide/show jobs of a particular status.
- Resource Filter
Use the resource filter to restrict the view to a particular resource. Simply begin typing into this box to search for a particular resource.
- Backlog
The backlog queue shows the list of jobs that you've created, but have yet to assign to both a resource and a particular time slot.
Interacting with the Calendar
You can interact with the calendar in various ways in order to allocate, schedule, and create jobs:
Creating a Job
To create a job using the calendar, double-click on a slot in the calendar to create a job for a particular date/time and resource. If you want to create a job for a particular time slot but aren't sure as to which of your resources to allocate the work to, then simply click the slot within the Unallocated column.
Rescheduling a Job
To change the start time for a particular job using the calendar, drag a job card to an alternative time slot. To change the duration for a particular job using the calendar, grab the bottom of the job card and drag down to increase the duration of the job.
Reallocating a Job
If you wish to swap a job from one resource to another, drag and drop the job card that you wish to swap, to the new resource and time-slot.